Summary
- Preserving Crisp Edge Definition in Artisan Canine Biscuits
- Heritage Bakery Silhouette Profiles and Clean-Cut Edges
- Artisan Debossed Stamps and Pressure-Plate Motifs
- Geometric Roller Textures and Embossed Surface Reliefs
- Dough Rolling Depth, Cutter Sizing, and Thermal Bake Matrix
- Edge-Blurring Oven Pitfalls and Moisture Control Failures
- Canine Baker Curing Protocol and Shelf-Stability Verdict
Preserving Crisp Edge Definition in Artisan Canine Biscuits
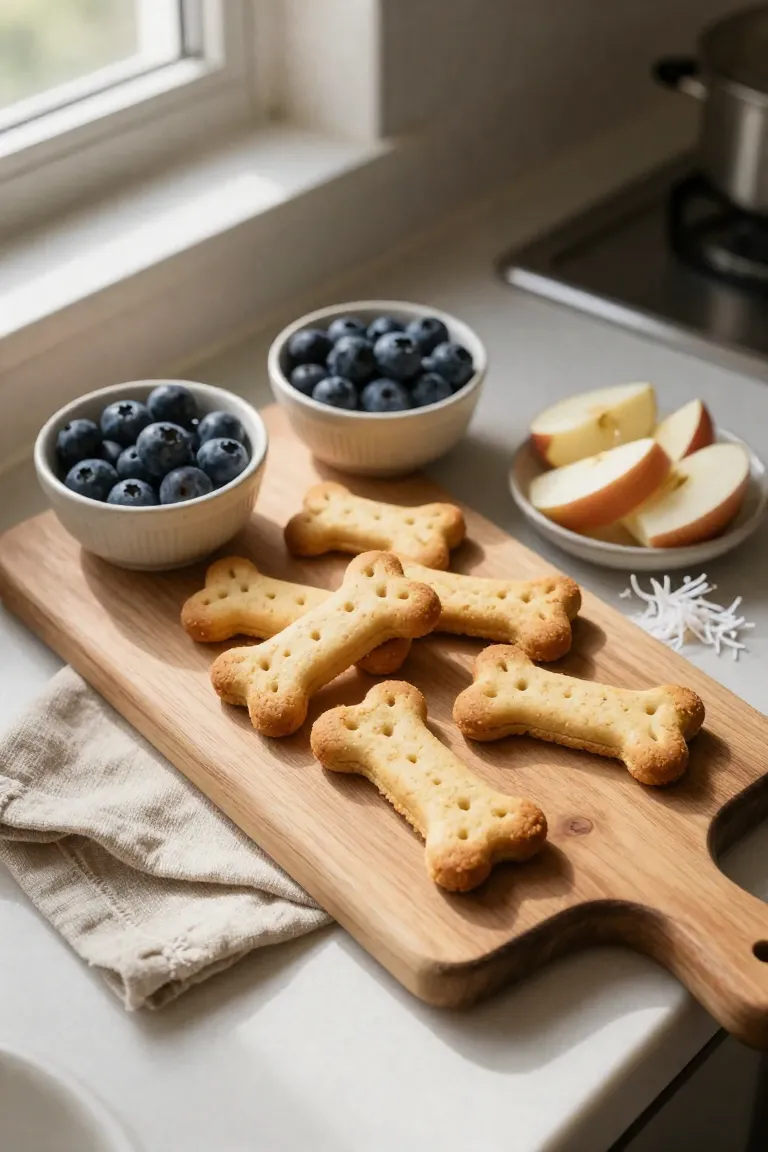
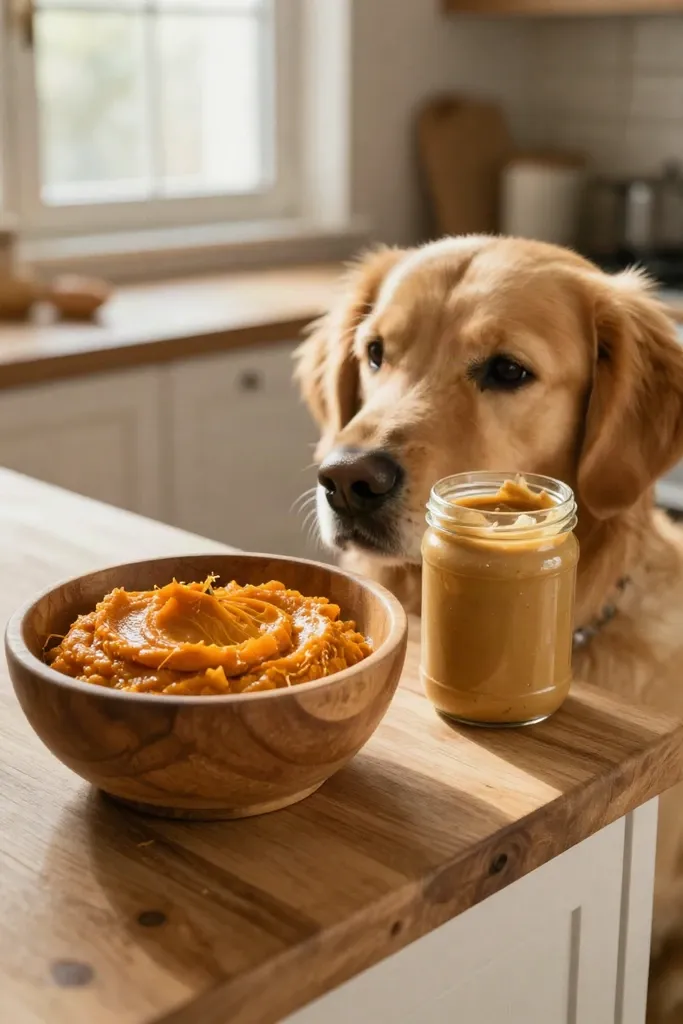
Baking homemade peanut butter dog treats with crisp silhouettes starts with managing moisture in your bowl. Canned pumpkin introduces heavy water, while natural peanut butter contributes dense plant oils. Tightening your pumpkin dog biscuit recipe with oat flour creates a sturdy base for artisan dog biscuit shapes and embossed dog treat ideas that hold fine detail straight through the oven bake.
Heritage Bakery Silhouette Profiles and Clean-Cut Edges
Cutting neat shapes out of rolled pumpkin dough depends heavily on the bevel of your tool and how cleanly it parts the wet mixture. Metal traditional dog treat cutters with tapered cutting edges shear straight through dense fiber without dragging the dough sideways. When you work with classic dog biscuit cutters across classic bone, heart, or scalloped outlines, paying attention to edge mechanics keeps every silhouette crisp.
- Thin stainless steel walls slice cleanly through sticky peanut butter dough without compressing the delicate perimeter.
- Tapered bevel rims create an immediate release path, preventing wet pumpkin paste from clinging to the interior corners.
- Light flour dustings along the cutting rim allow intricate canine cookie cutter shapes to drop free onto your baking sheet without stretching.
A quick tap on the counter after pressing frees stubborn dough rounds, keeping your profiles uniform across the baking sheet.
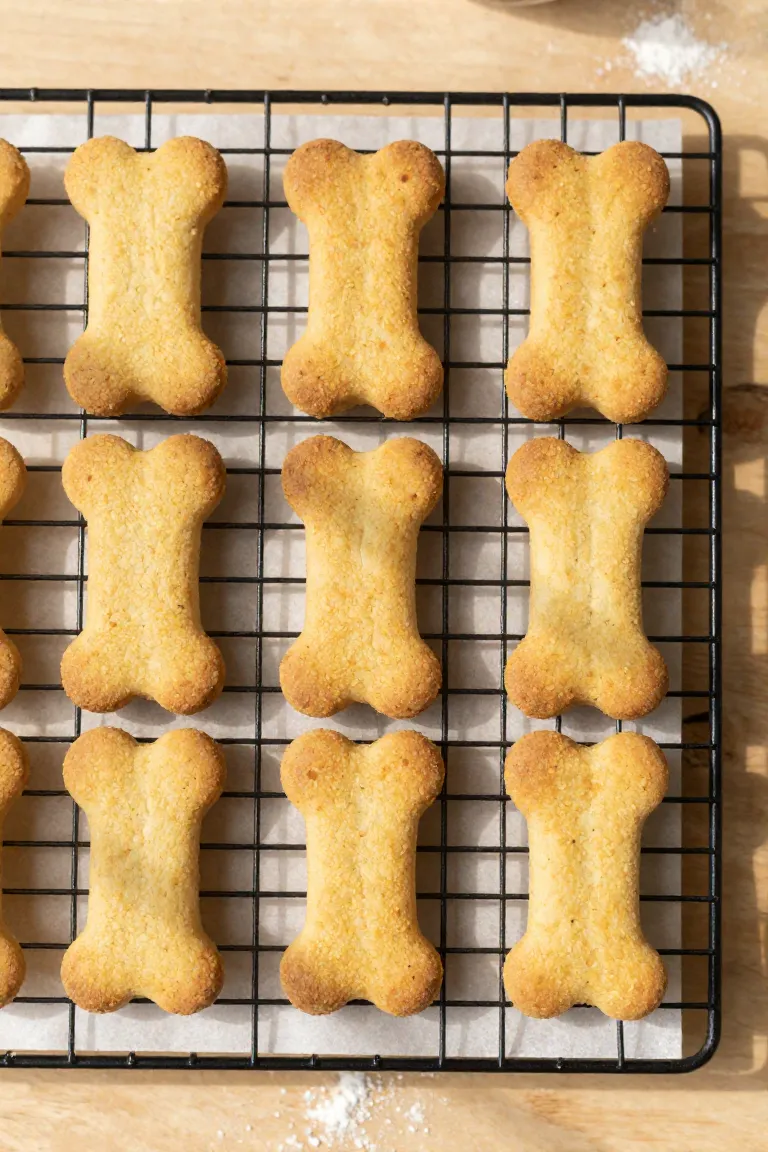
Classic Notched Canine Bone Silhouette
A standard 3.5-inch classic bone dog biscuit cutter with dual-notched ends gives treats that quintessential bakery look your dog instantly recognizes. Because peanut butter contains natural fats that soften quickly on a warm kitchen counter, precise temperature and steady cutter pressure make the difference between sharp edges and slumped biscuits.
- Roll your prepared dough to an even 1/4 inch thickness between two sheets of parchment paper so the surface stays flat and uniform.
- Slide the rolled slab into your refrigerator for a mandatory 15-minute chill, which firms the fats in your peanut butter dog bones and stops edges from slumping.
- Press the cutter straight down into the firm sheet without twisting, letting the sharp metal slice through dough fibers to produce crisp edge dog biscuits with distinct notched corners.
Dull edges drag dough fibers downward, so pressing straight down delivers clean homemade bone shaped dog treats that resist oven heat spread during the initial bake.
Fluted Scalloped Baker Tea Round
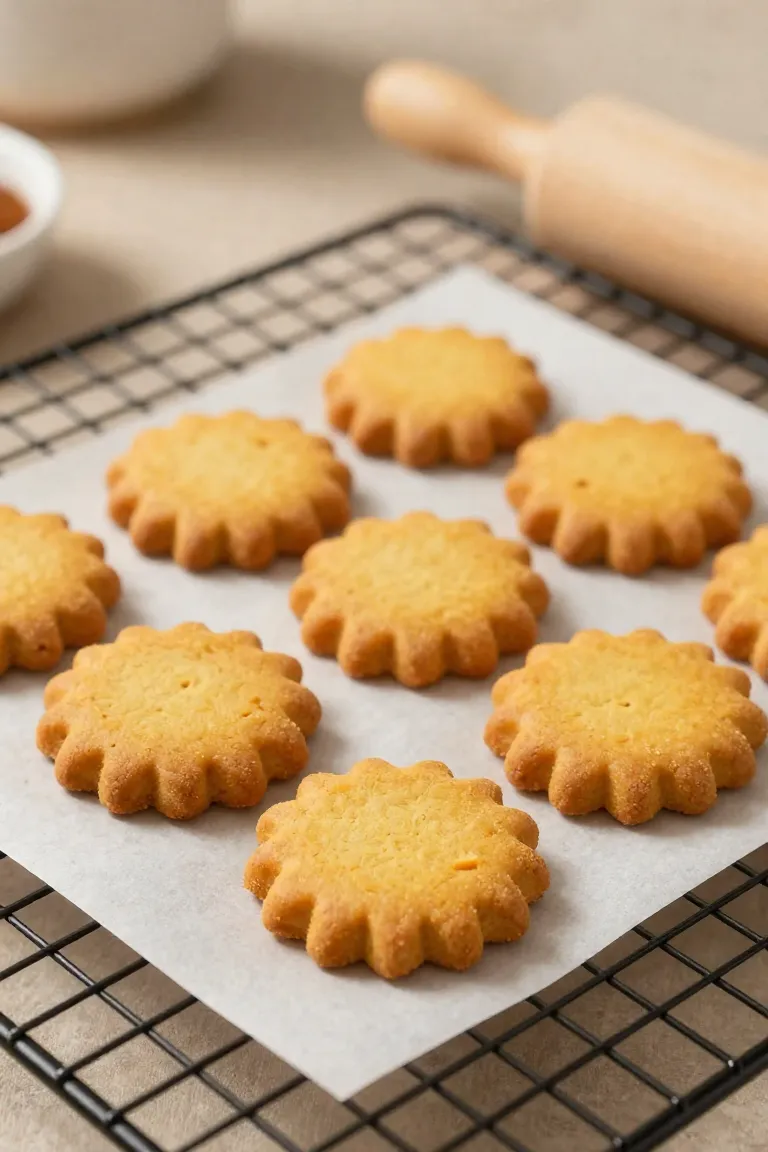
The 2-inch fluted tea round brings classic bakery charm to your treat jar while giving pups an extra-satisfying crunch. This ridged perimeter creates tiny textural points that appeal to canine teeth, while the circular shape bakes more evenly than elongated silhouettes. Crafting uniform artisan canine biscuits with ribbed borders requires simple cutter habits to keep the dough from snagging.
- Deep fluted ridges increase the total perimeter surface area, turning scalloped dog biscuit treats into sturdy crunch bites dogs love.
- Symmetrical circular geometry channels oven warmth uniformly from edge to center, allowing crunchy pumpkin dog rounds to dry thoroughly without burned tips.
- A regular flour-dusting routine on the cutter edges prevents wet dough from sticking inside the small fluted crevices.
On my counter, dipping the fluted ring in oat flour before every second cut keeps fluted round dog cookies dropping free without torn edges.
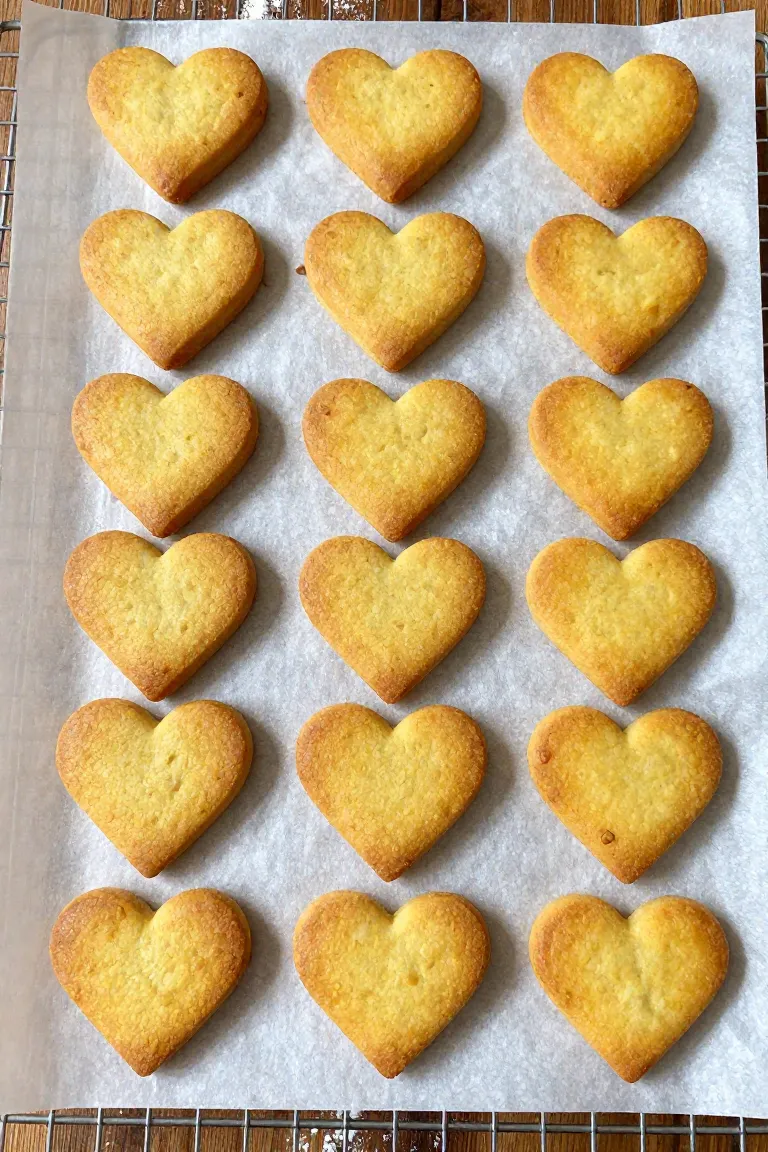
Tapered Heart Silhouette Baker Cut
Switching to a 2.5-inch symmetrical cutter gives your peanut butter heart dog treats an unmistakable bakery look, but the shape introduces an uneven baking challenge. The wide upper lobes hold substantial moisture from the pumpkin puree, while the narrow bottom point thins out into an acute tip. When hot air circulates across a flat metal tray, that pointed bottom absorbs heat far faster than the heavy top half, often scorching before the center bakes dry.
To keep your heart shaped dog biscuits evenly golden from crest to point, place them in a concentric circle on your baking sheet with the narrow tips pointing toward the center of the pan. The exterior perimeter of a baking sheet always runs hottest, so directing the thicker, moisture-dense lobes toward the pan edges shields the delicate tips from direct thermal blast. This simple tray layout ensures your baked pumpkin dog hearts crisp through uniformly, turning these diy healthy dog treats into crunchy snacks that snap cleanly without burnt edges.
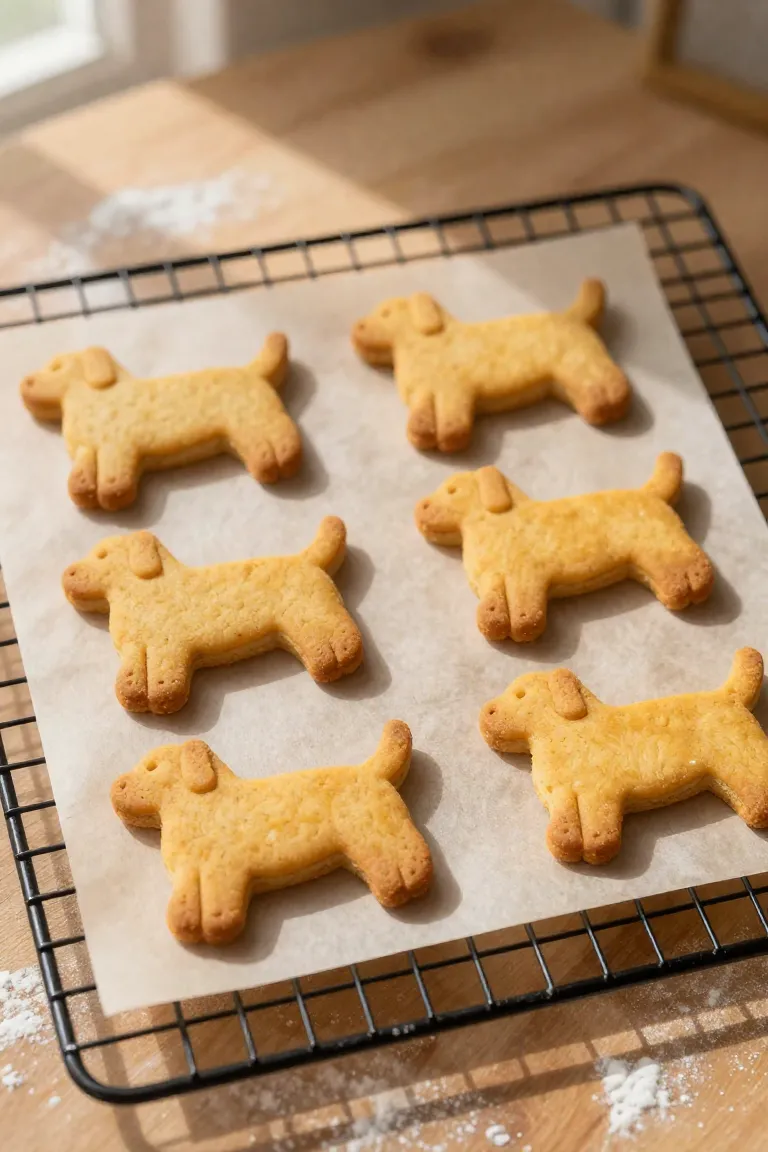
Tail-Wagging Retriever Profile Cut
Detailed side-profile cutters capture wonderful breed personality, yet slender tail and ear outlines require careful handling on the prep counter. When you press a 3-inch dog silhouette biscuit cutter into your rolled mixture, those narrow extensions dry out at a much faster rate than the bulky body torso. Maintaining a strict dough thickness of 1/4 inch provides enough thermal mass so thin tail tips do not turn bitter, because rolling down to 3/16 inch causes slender tail extensions to char within 18 minutes at 325 degrees F.
- Roll your dough between guided wooden dowels to preserve a uniform 1/4-inch depth across every section before pressing your custom dog biscuit cutouts.
- Slide an offset metal spatula completely beneath each shape to lift it from the counter, preventing fragile ears from stretching out of proportion during the transfer.
- Set the retriever shape dog treats onto a parchment-lined baking sheet with at least 1/2 inch of clearance around every slender tail.
I notice that chilling the rolled sheet for ten minutes makes lifting these delicate shapes trouble-free and keeps every limb crisp. That extra step preserves clean silhouettes, rewarding your pup with sturdy, crunchy homemade dog biscuits that hold their recognizable form straight out of the cooling rack.
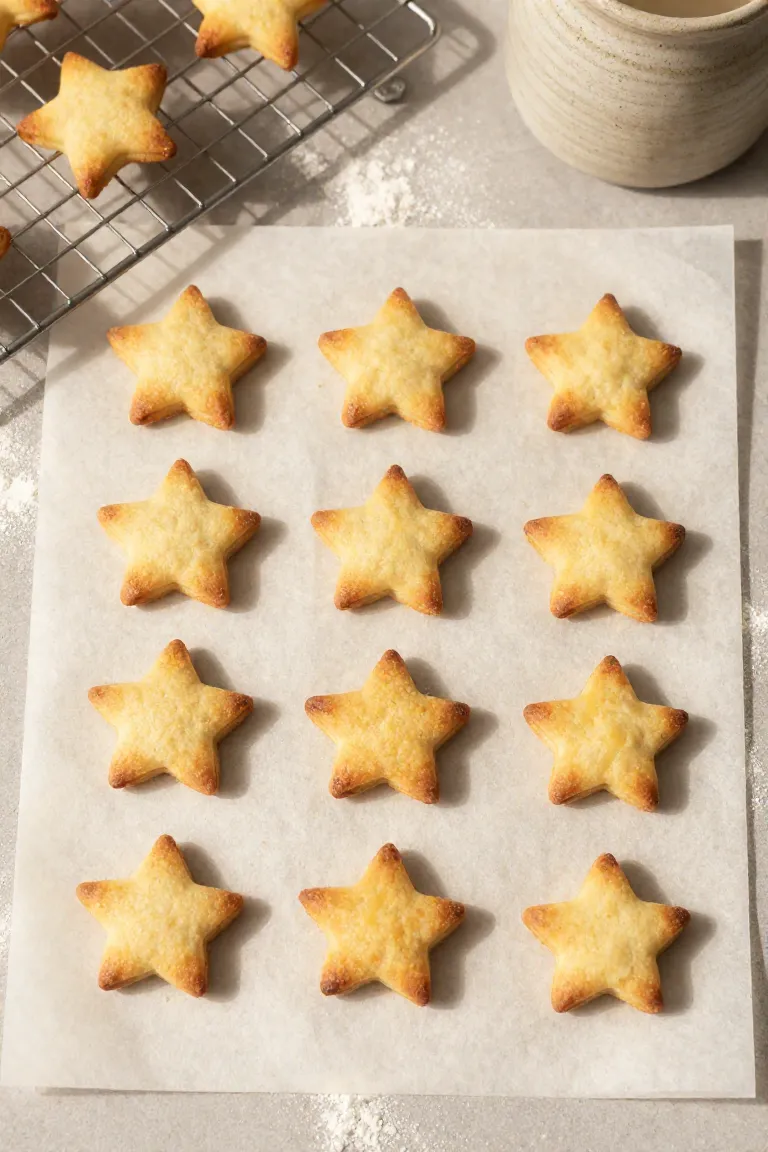
Petite Star Training Nibble Silhouette
Baking pocket-friendly rewards calls for compact geometry, and 1-inch miniature five-point star cutters create the ideal portion size for continuous practice sessions. Because each cutout has minimal surface area, heat penetrates the dough core rapidly, allowing starches to cook through in record time. Running your oven at a 300 degrees F low-convection setting distributes gentle circulating warmth, preventing the five delicate points from singeing while the interior moisture evaporates completely.
- Bake times drop to just 14 to 16 minutes, protecting the star points from drying out into fragile ash.
- Rapid heat penetration accelerates starch gelatinization across the center, yielding bite sized dog biscuits that stay solid in your treat pouch.
- The compact 1-inch footprint makes these mini star dog treats ideal for rapid reinforcement without overfeeding during lengthy obedience drills.
- Even shrinkage across the five radiating spokes preserves balanced geometry so your small dog pumpkin treats bake flat without curling.
These quick-baking training nibble biscuits develop an intensely crisp snap that will not crumble into messy pockets, giving you a clean, dependable reward for daily walks.
Artisan Debossed Stamps and Pressure-Plate Motifs
Adding embossed surface impressions turns simple cutouts into bakery-case showcase pieces, but pressing detailed designs into pumpkin dough requires the right technique. Because peanut butter and squash purees create a naturally elastic, tacky texture, pressing too hard can pinch the edges or trap air underneath the die. Maintaining a dough depth of at least 3/8 inch gives the relief plate enough vertical cushion to receive the impression without squishing the biscuit flat or distorting its outer perimeter.
Before you stamp each piece, dust your canine cookie stamp designs with a light coat of fine oat flour, tapping off any loose powder so the crevices stay sharp. Align the tool directly over the cutout and apply firm, straight downward pressure using the heel of your palm rather than rocking from side to side. Lifting the plate cleanly away releases your debossed dog biscuits with pristine botanical lines and paw grooves, proving that pairing embossed dog treat stamps with proper moisture management creates crisp, photo-worthy treats every single time.
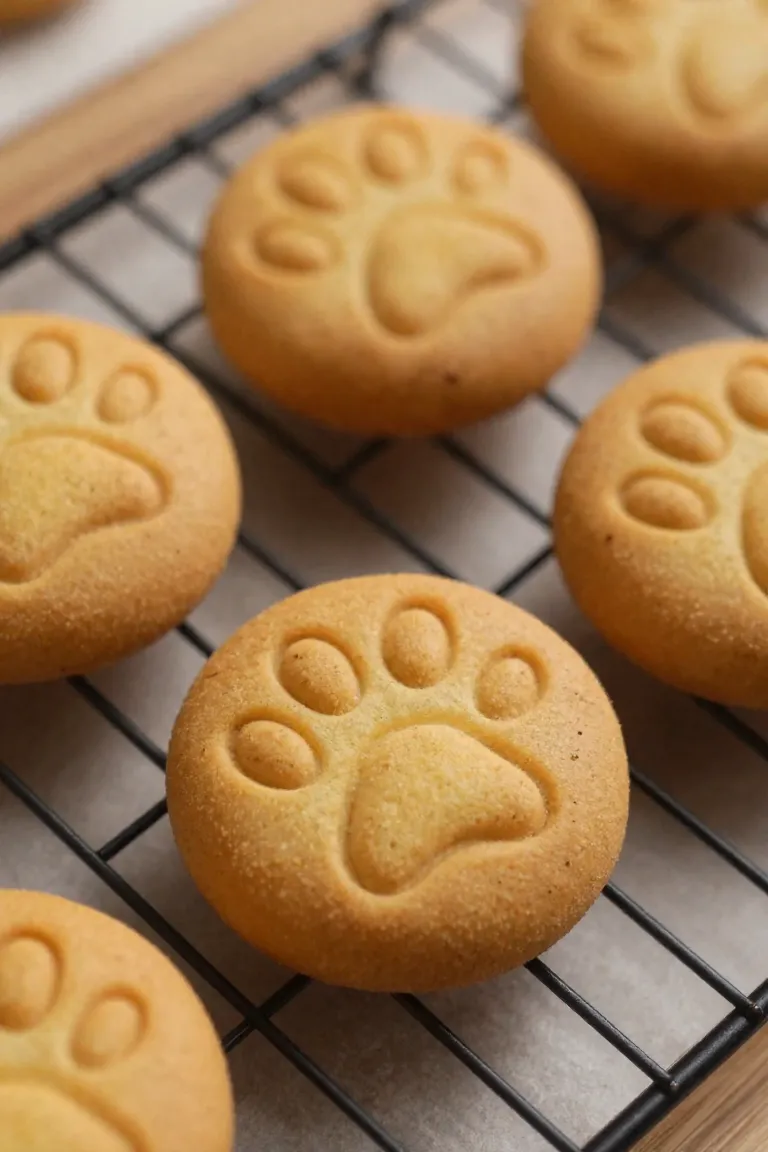
Crisp Recessed Canine Paw Print Medallion
When you want to turn out neat, bakery-style paw print dog biscuits, two-piece spring-loaded plunger cutters make quick work of a two-inch disc while pressing deep, defined pad recesses into the surface. Getting these embossed paw print dog treats right comes down to precise dough thickness and keeping the smaller details from tearing as you lift the cutter.
- Roll your dough to a consistent 3/8 inch thickness so the 1/8 inch indentation molds smoothly without puncturing the bottom crust.
- Dip the cutter head into a 50-50 dusting blend of oat flour and cornstarch before every press to prevent sticky dough buildup inside the toe pads.
- Press the outer cutting rim firmly to slice the perimeter, then engage the center plunger with steady downward pressure before releasing the cookie onto your baking sheet.
This reliable approach ensures your stamped dog biscuit recipe yields clean pumpkin paw print treats with crisp outlines that hold their shape from rolling pin to cooling rack.
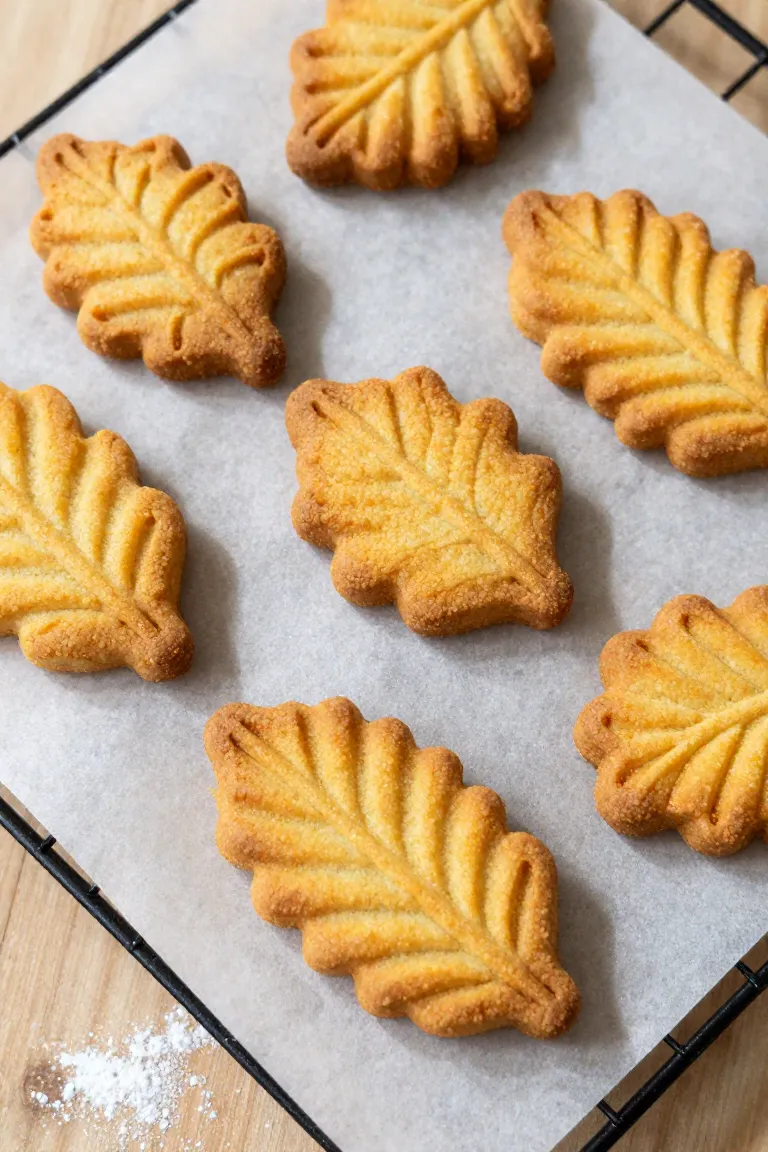
Autumn Pumpkin Ribbed Leaf Stamp
Veined leaf stamps bring a lovely seasonal touch to your autumn leaf dog biscuits, turning simple pumpkin rounds into polished bakery creations. The secret to keeping delicate vein ridges sharp during baking lies in limiting dough hydration to roughly 40 percent. If your dough runs too wet, lateral steam escaping through the oven cycle will soften the leaf markings and flatten the intricate textures you worked so hard to press.
Chill your rolled sheet for twenty minutes before stamping so the peanut butter and pureed pumpkin firm up completely. Cold dough allows the secondary stem lines to pop out cleanly without dragging or tearing, giving you crisply defined ribs on every batch of stamped seasonal dog cookies. Once cut, transfer these fall homemade dog treats directly to a cold parchment-lined tray so your pumpkin leaf dog treats maintain their botanical ridges straight through the bake.
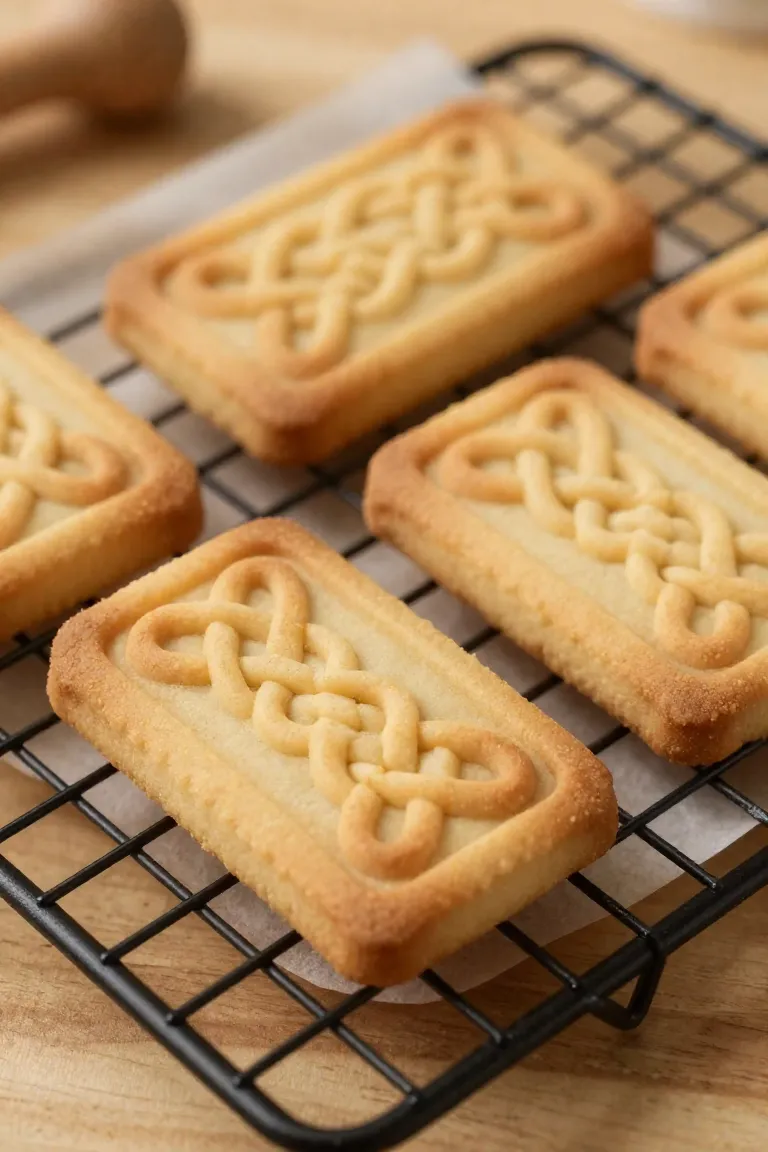
Celtic Braided Knotwork Plaque
For an elegant presentation that feels straight out of an upscale pet boutique, a two by three inch rectangular plaque cutter creates stunning embossed plaque dog treats with woven ribbon effects. Using a carved wooden or textured silicone relief stamp requires balanced, steady pressure so every crossing cord prints with uniform clarity.
- Center the stamp squarely over your rolled dough rectangle, keeping your wrists level to ensure even downward force across all braided segments.
- Apply direct vertical weight with both hands, avoiding any temptation to rock the mold side to side.
- Lift the plaque straight upward to free your knotwork stamped dog biscuits without catching on fine edges.
If you rock the stamp, it inevitably pinches the dough unevenly, leaving thin spots that can brown prematurely during the 325 degrees F bake cycle. Sticking to an upright press guarantees your artisan pressed dog cookies and decorative pumpkin dog biscuits bake to a balanced, golden crunch.
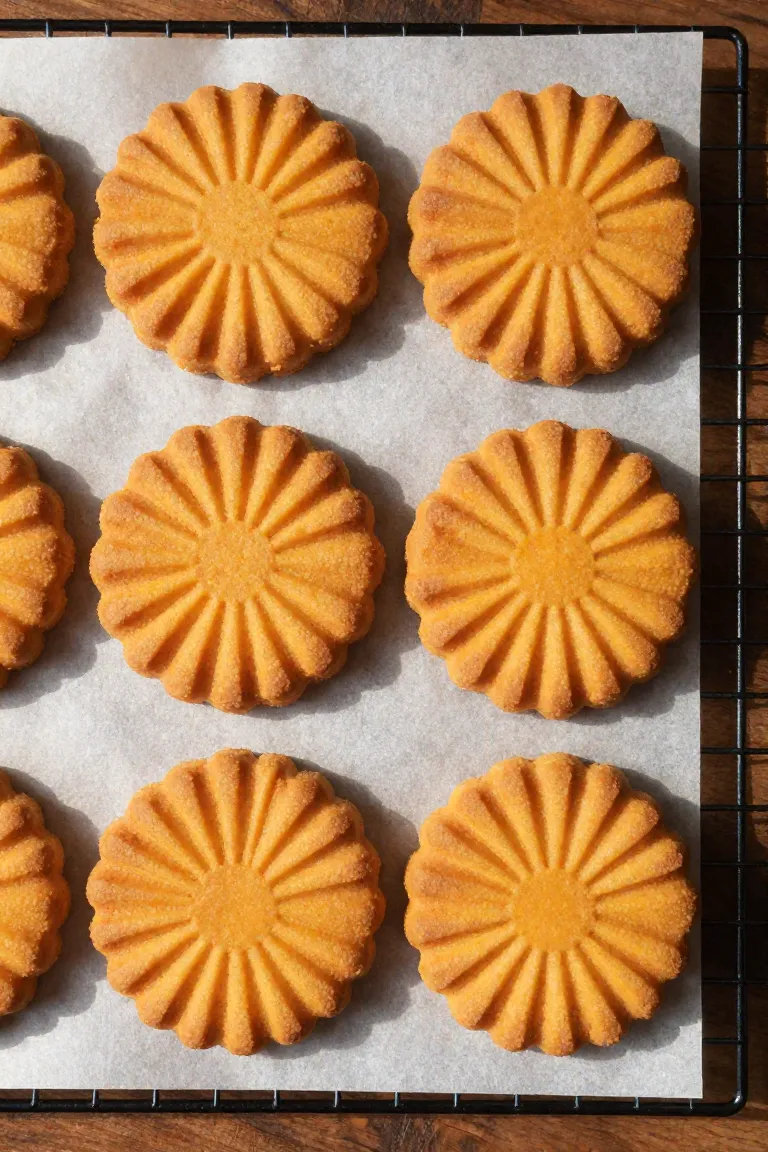
Radial Sunburst Hearth Crest Medallion
Circular medallions stamped with outward-radiating lines bring a rustic hearth charm to your collection of decorative canine biscuits. Beyond their striking appearance, the grooves pressed by a sunburst dog treat stamp serve a clever functional purpose during the baking process.
- Outward channels provide natural venting paths, allowing internal moisture to escape easily without bubbling or blistering the smooth center medallion.
- Leaving out leavening agents like baking soda or baking powder prevents thermal expansion that would otherwise puff up and blur the radiant rays.
- Lightly brushing the unbaked rounds with oat flour before pressing keeps the radiating spokes crisp and cleanly etched.
By letting heat vent naturally through the embossed pattern, your radial embossed dog biscuits emerge flat and durable, giving your pup crunchy, textured pumpkin dog treats that look as wonderful as they taste.
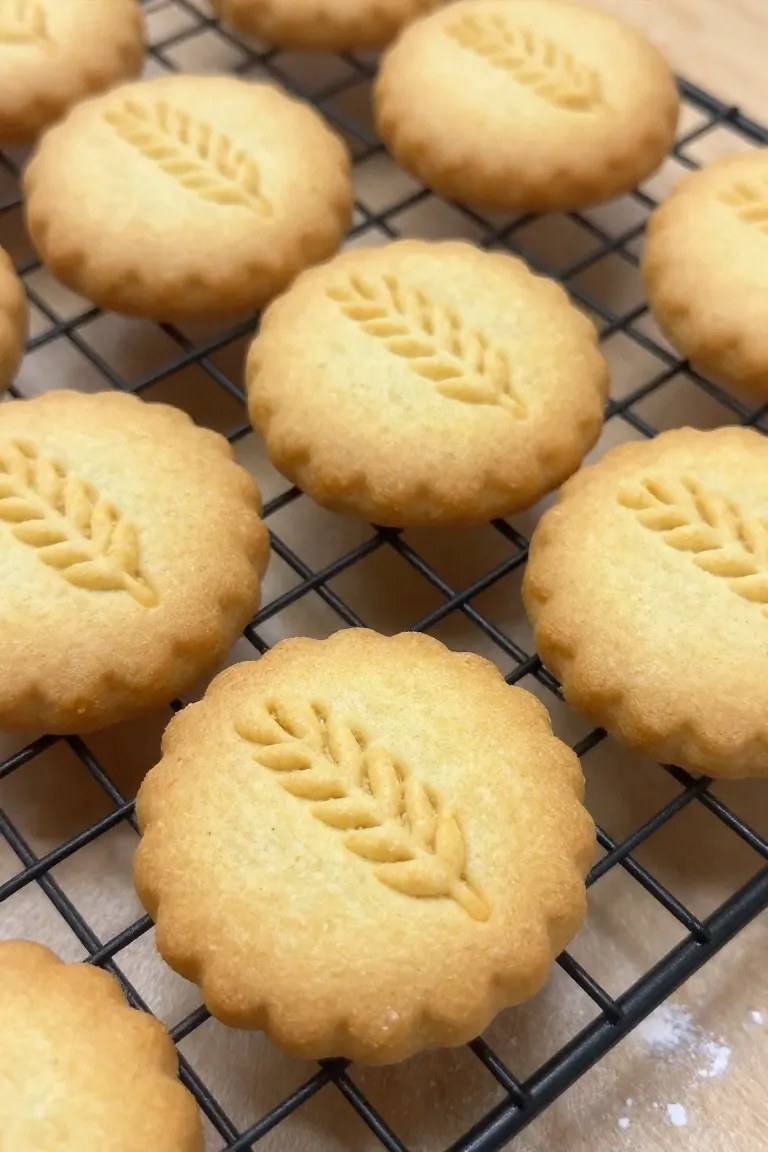
Harvest Wheat Sheaf Debossed Round
When you want to capture delicate autumn imagery on your treats, a detailed stalk pattern brings delightful bakery charm to every batch. Pressing an intricate wheat motif onto a 2.25-inch circular cookie requires a dough with an ultra-fine texture so every tiny grain kernel stands out clearly. Switching from standard coarse bran to finely ground whole oat flour provides a satiny, uniform surface, preventing stray fiber specks from blurring the fine botanical cuts. These oat flour embossed dog biscuits hold their shape beautifully in the oven, ensuring your wheat motif dog treats showcase clean ridges without puffing out of proportion.
Clean releases are just as essential as the right flour blend when working with botanical dog biscuit stamps. Dough naturally sticks inside shallow crevices after repeated pressings, which can soften the delicate wheat stalks. Lightly brush the face of your stamp with a tiny bit of unflavored food-grade coconut oil every ten impressions to keep each release smooth and clean. Your harvest pumpkin dog treats will drop onto the baking sheet with sharp, crisp definition, ready for a low and slow bake that locks in both crunch and visual appeal.
Geometric Roller Textures and Embossed Surface Reliefs
Carving surface patterns into an entire sheet of dough makes batch preparation efficient while creating delightful embossed textures for your canine companion. Working with textured rolling pin dog treats allows you to imprint repeating geometric dog biscuit patterns and shallow vents across the whole sheet in a single fluid pass, which aids even moisture evaporation during the drying phase.
- Roll your chilled pumpkin dough to an even quarter-inch thickness on parchment paper using a smooth base pin, keeping the top surface lightly dusted with oat flour.
- Glide your chosen pattern pin across the dough in one continuous motion from bottom to top, applying firm downward pressure to imprint crisp harlequin ridges without stretching the edges.
- Pierce the center of each pattern section using a standard blunt baker skewer, adapting practical techniques from docked dog cracker recipes to anchor the layers and release hidden steam pockets.
Once the sheet is imprinted and vented, slide your pastry wheel along the pattern borders to separate clean bites that bake evenly from corner to core.
Criss-Cross Baker Lattice Tile
An interwoven lattice grid turns simple dough sheets into rustic, artisan snacks that look like miniature bakery tiles. By embossing a continuous criss-cross texture across the prepared dough before slicing it into 2-inch squares, you create an array of intersecting channels. These embossed grooves increase the outer crust surface area by approximately 25 percent, which speeds up internal moisture evaporation and shaves about 15 minutes off your total oven drying time. The result is a batch of crunchy lattice dog cookies that snap crisply without requiring prolonged heat exposure.
Steady momentum during the rolling phase guarantees your square baked dog snacks retain uniform ridge depth across every single square inch. A swift, steady roll across the dough sheet prevents bunching or uneven drag, which often happens if you hesitate mid-stroke. Using an embossed textured pin dog treats roller with consistent downward weight yields clean, well-defined lattice embossed dog biscuits that dry out thoroughly and hold up wonderfully in your treat jar.
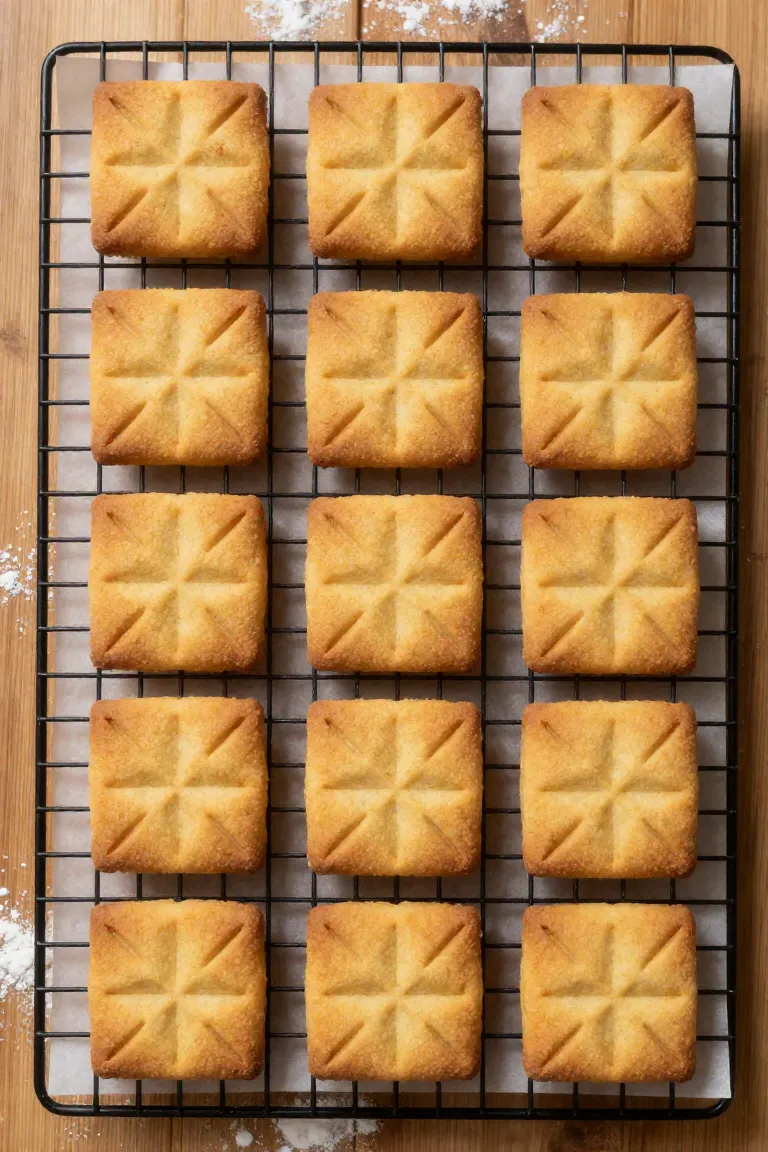
Diamond Quilted Harlequin Lozenge
Quilted diamond lozenges bring an elegant, geometric presence to your homemade collection, combining raised seams with dependable structural stability. Rolling an acrylic diamond pattern pin across the dough forms crisp harlequin dog biscuits that break easily along embossed score lines while baking up completely flat.
- Natural peanut butter fats release into the acrylic grooves during embossing, naturally lubricating the tool face and leaving a subtle semi-sheen gloss over the raised seams as the cookies cool.
- Docking each diamond intersection with the tip of a blunt wooden skewer pins the upper and lower dough strata together, eliminating center air hollows and preventing pillowing in the oven.
- Angled lozenge edges maximize cookie sheet capacity, letting you slice dozens of geometric canine snacks with zero dough waste or scraps left behind.
- Uniform diamond ridges allow gentle heat penetration right through the center, producing crunchy peanut butter pumpkin lozenges with a dependable, crumb-free snap.
These polished diamond embossed dog treats pack neatly into airtight storage tins, keeping their crisp bakery finish for weeks of daily rewards.
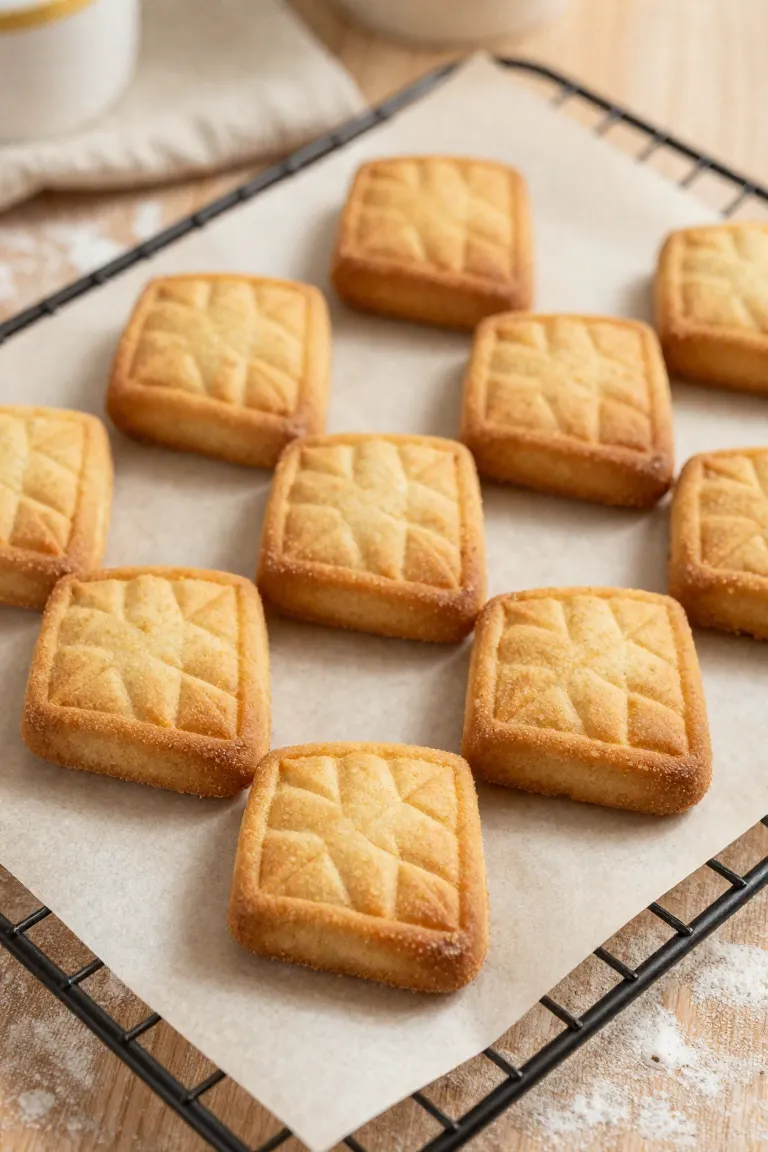
Hexagonal Honeycomb Cell Grid
When you want to skip rerolling scrap dough altogether, geometric tessellated dog cookie shapes offer the smartest kitchen shortcut. Pressing an interlocking six-sided cutter across rolled dough creates interlocking hexagonal dog treats with zero awkward offcuts left behind. Every home baker knows that repeatedly gathering and re-kneading pumpkin dough works up unwanted gluten, which turns delicate biscuits leathery rather than snappy. By cutting in a single continuous matrix, the dough retains its tender crumb while baking evenly from corner to corner, giving your pup a satisfyingly brittle crunch every single time.
For the best bite, aim for a balanced 6 mm biscuit thickness with miniature 2 mm deep cell depressions indented across the top face. These geometric pockets allow puppy teeth or adult canine molars to find easy purchase without crushing the wafer into fine powder. Even when crafting grain free pumpkin dog treats made with dense garbanzo or oat flours, these compact honeycomb dog biscuits dry thoroughly across the shallow ridges, preventing trapped pocket steam from softening the interior crumb during jar storage.
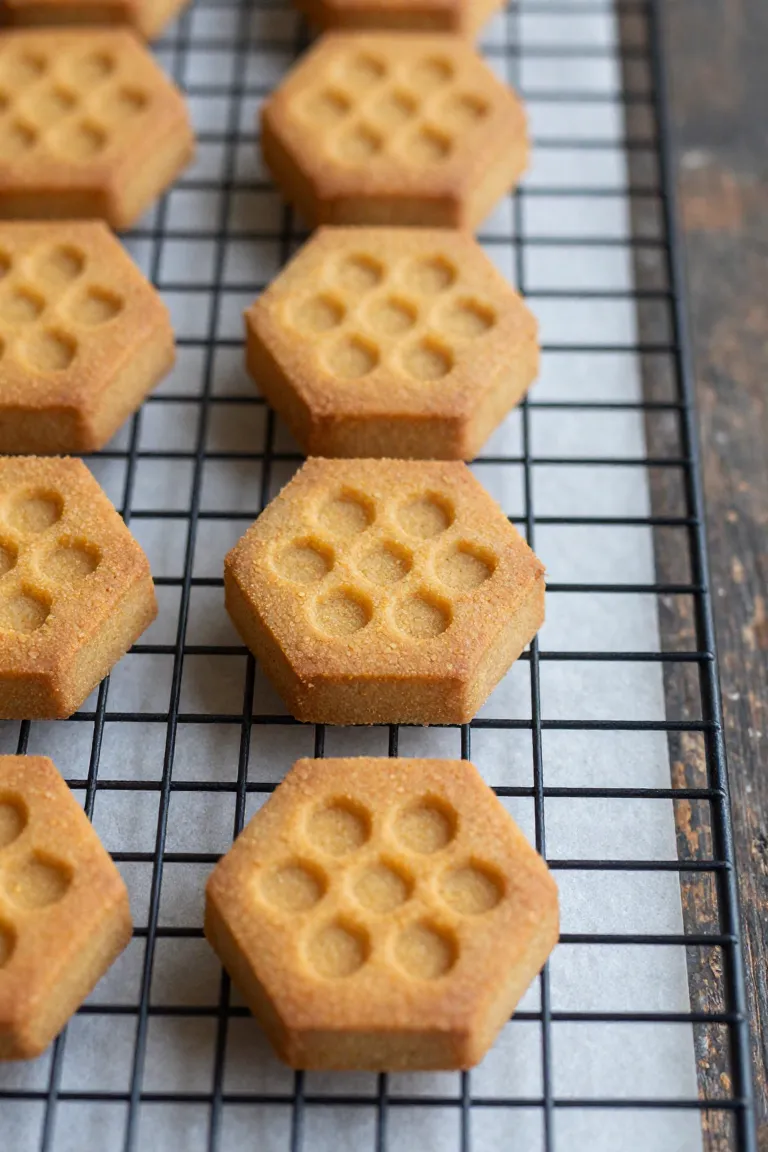
Fluted Ribbon Crimped Crunchy Slices
A simple rotary pastry wheel transforms a flat sheet of dough into classic fluted dog treat sticks in minutes, avoiding fiddly individual cutters entirely. Guiding the fluted wheel in straight parallel lines creates uniform 1 by 3.5 inch crimped dog biscuit ribbons that bake with charming wavy margins and rustic bakery character.
- Mechanical grip along undulating edges lets dogs grasp each crunchy pumpkin ribbon biscuit firmly with their front paws without slipping.
- Thin wavy perimeters increase the exposed surface area, encouraging rapid moisture evaporation so the core dries out cleanly without scorching.
- Baking sheets at 325 degrees F for 22 minutes produces a golden baseline, while a subsequent closed-oven drying stage locks in maximum fracture crunch across the whole batch.
Once cooled completely on wire racks, these homemade canine crunch treats deliver that clean, dry snap that makes reward sessions genuinely satisfying for both of you.
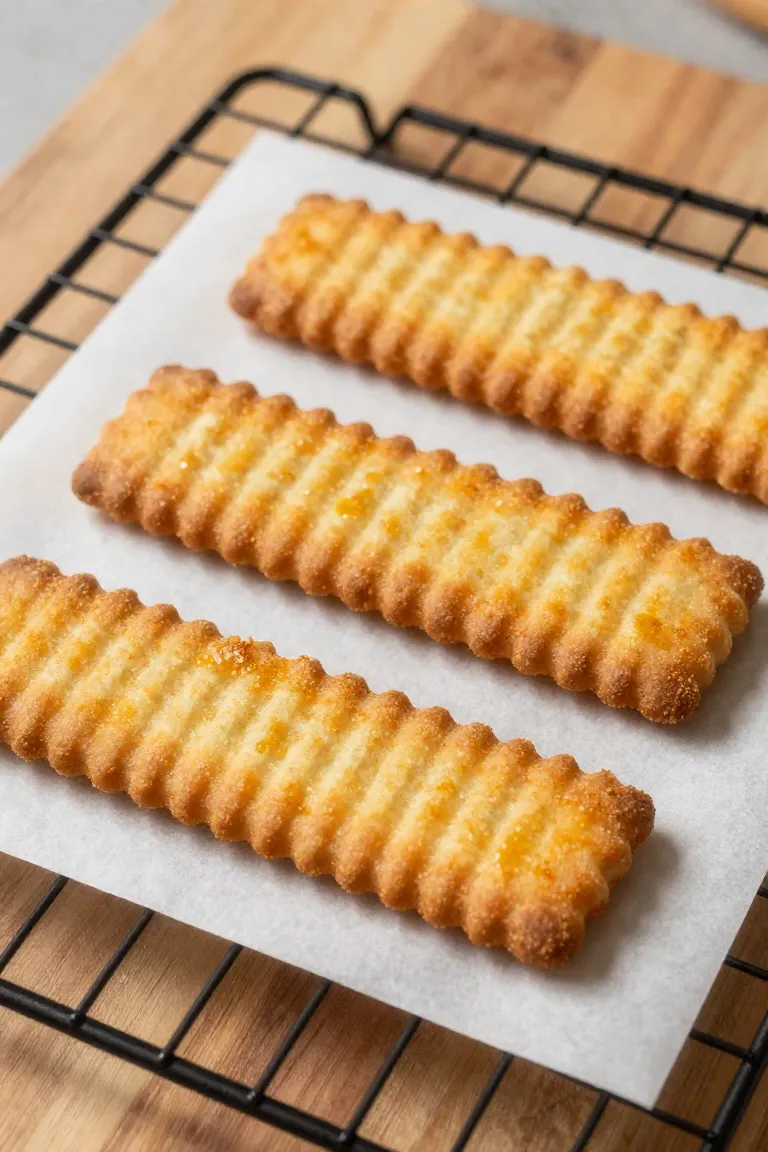
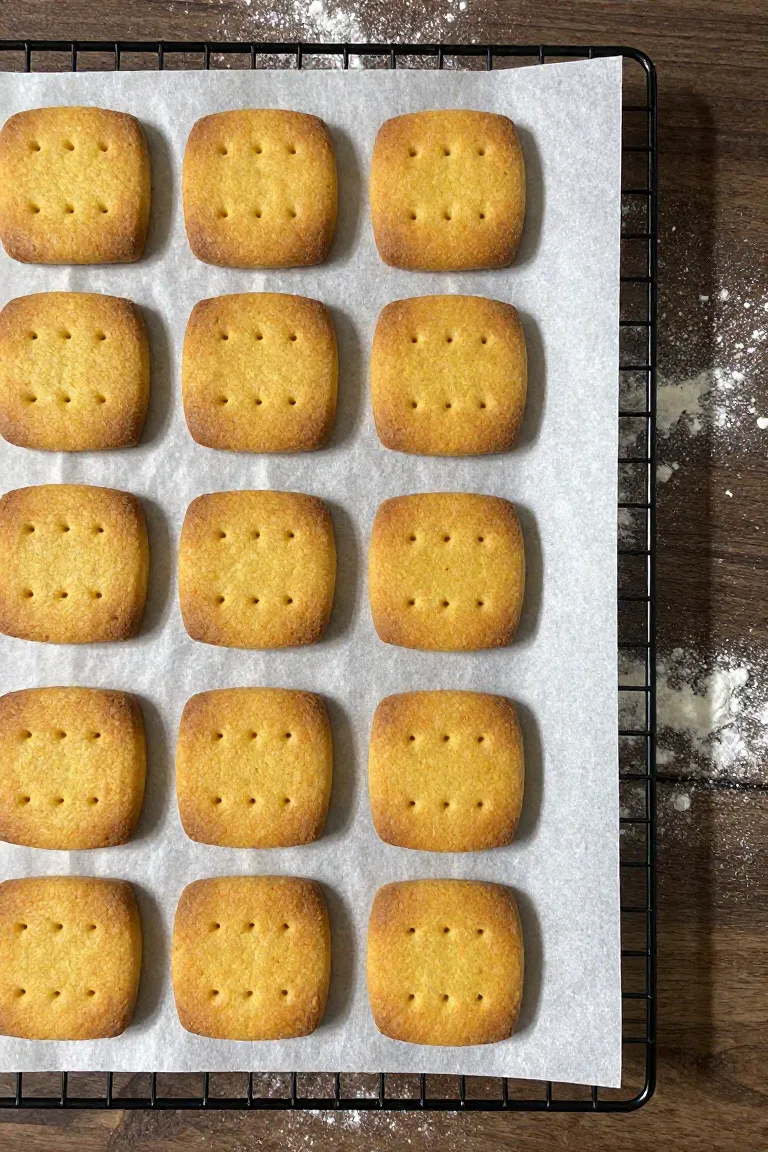
Dimpled Graham Cracker Docked Square
Nothing matches the clean vintage charm of square pumpkin dog biscuits, especially when perforated like traditional pantry crackers. When moisture turns to steam in the oven, unvented dough tends to puff up in the center, causing awkward dome shapes that crumble easily and refuse to sit flat in storage jars.
- Roll your prepared dough flat onto parchment paper, then stamp out tidy 2.5-inch squares using a sharp bench scraper or straight fluted cutter.
- Use a blunt pastry docker or clean fork tines to press sixteen evenly spaced holes straight through each piece, creating perforated canine crackers that vent internal steam reliably.
- Bake until the perimeters turn golden and dry, letting steam escape through the dimples so your crisp peanut butter dog biscuits settle into dead-flat pantry crackers ready for tidy tin stacking.
This upward release of internal steam protects the outer cutter edges, keeping your docked dog crackers sharply defined from sheet to jar.
Dough Rolling Depth, Cutter Sizing, and Thermal Bake Matrix
Nailing a consistent dog biscuit rolling depth transforms everyday home baking into professional treat crafting, ensuring every piece cooks through at the exact same pace. Pairing guide rings on your rolling pin with deliberate oven heat guarantees that fine debossed patterns and crisp edges remain sharp without spreading into soft blobs.
- Slip 1/8 inch silicone rings onto your pin for petite bite-sized training snaps, expand to 1/4 inch rings for standard silhouette bone treats, and move up to 3/8 inch thickness for heavy debossed stamps requiring deep imprint cavities.
- Match your dough sheet to appropriate tool bevels, noting that tinplate and stainless steel cutters slice clean borders through chilled sheets, whereas resin impression stamps require generous release clearance to avoid tearing delicate pumpkin dough.
- Set your oven to a steady 325 degrees F for the initial 20 to 25 minute bake to set structural outlines, followed by a secondary low-heat cure at 200 degrees F for 90 minutes to evaporate residual water weight.
- Dialing in the exact baking temperature embossed biscuits require prevents puffing, while extending the drying phase guarantees a brittle, rock-hard snap throughout the biscuit core.
A close match between cutter depth and dough thickness keeps your embossed motifs sharp, flat, and shelf-stable for months in the cookie jar.
Edge-Blurring Oven Pitfalls and Moisture Control Failures
Even carefully rolled cutouts can melt into soft, unrecognizable blobs once heat hits the baking sheet if your hydration balance is slightly off. The main culprit behind why dog biscuits lose shape usually hides in canned pumpkin puree moisture baking levels, which can introduce far more water than your flour base can absorb. Pressing your puree through triple-layered cheesecloth or paper towels before mixing removes that extra liquid so your stamped impressions stay crisp. You also want to skip leavening agents completely, because baking powder or sodium bicarbonate creates tiny steam pockets that puff the crust and erase shallow ridges entirely.
Warm fat creates another quiet point of failure when preventing stamped cookie spread on delicate silhouettes. If natural oils from your peanut butter soften under warm kitchen lighting or through prolonged hand kneading, your designs soften along with them. Practical dog treat embossing tips call for sliding your rolled sheet into the refrigerator for a quick 20-minute chill right before you press your stamps or cutters. That quick cold rest firms the dough fats solid, giving you clean release and needle-sharp boundaries that survive the oven without slumping.
Canine Baker Curing Protocol and Shelf-Stability Verdict
Pulling your batch from the oven is only half the battle when you want long-lasting treats that stay safe in the pantry without artificial preservatives. Properly curing homemade dog biscuits requires driving out the stubborn residual humidity hiding in the biscuit center so mold never finds an invitation to grow.
- Turn off the oven at the end of the bake cycle and leave the treats resting on the warm stone or baking rack with the door propped open two inches for at least an hour to let residual heat draw out interior water vapor.
- Perform the snap test by breaking one cooled sacrificial biscuit right across its thickest embossed section to verify an audible, clean crack with zero crumbly sponge texture in the core.
- Transfer the fully cooled bones into an airtight metal tin lined with unbleached parchment paper, keeping the container in a cool, dark cupboard away from kitchen steam.
These straightforward storage habits let your crunchy batches stay fragrant and mold-free for up to three months. Storing crunchy pumpkin dog treats away from warm appliances and direct sunlight preserves that satisfying bakery snap that keeps your pup eagerly waiting by the cookie jar.