Summary
- The Science of Dog-Safe Icing: Overcoming Moisture Retention and Surface Tackiness
- Precision Half-Dip Finish with Greek Yogurt and Tapioca Base
- Delicate Linear Drizzle Application Across Golden Biscuit Ridges
- Fine-Tip Perimeter Piping for Defined Bone and Paw Contours
- Two-Tone Marbled Feathering Using Natural Carob and Yogurt Glazes
- Full Submersion Coating with Suspended Wire-Rack Runoff
- Crosshatch Lattice Piping for Grip and Visual Dimension
- Stenciled Botanical Dusting Over Moist Tapioca Wash
- Controlled Raised Droplet Accents and Concentric Dot Work
- Glaze Viscosity Ratios and Starch Setting Formulas
- Moisture-Trapping Pitfalls and Room-Temperature Curing Protocols
- Bakery-Grade Decision Framework for Consistent Treat Finishing
The Science of Dog-Safe Icing: Overcoming Moisture Retention and Surface Tackiness
Human confectionery frostings rely on powdered sugar to crystallize and dry hard, but dog safe glaze ingredients require entirely different chemistry. Natural oils from peanut butter migrate toward the biscuit crust, softening standard coatings. Formulating a durable dog treat icing recipe demands starch stabilization, allowing your canine bakery coating to set firm at room temperature without turning tacky inside storage bags.
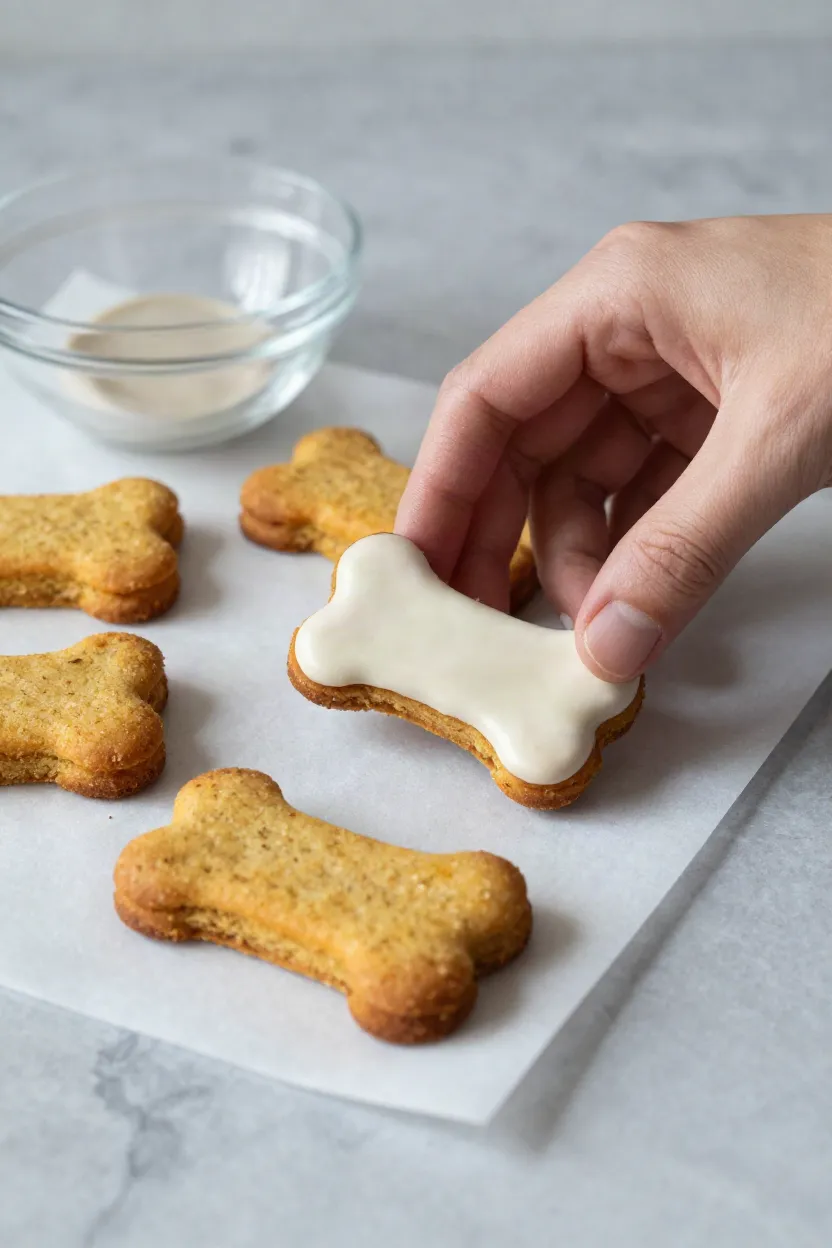
Precision Half-Dip Finish with Greek Yogurt and Tapioca Base
Achieving crisp contrast on half dipped dog biscuits starts with controlling temperature and surface angle. Blend strained Greek yogurt and tapioca starch in a warm 2-to-1 ratio until the mixture flows smoothly without air bubbles.
- Lower one half of each cooled pumpkin biscuit into the greek yogurt dog glaze at a clean 45-degree angle to establish an even diagonal line.
- Hold the biscuit directly above the bowl for exactly 8 seconds, letting the excess tapioca dog treat frosting sheet off cleanly rather than drip unevenly.
- Transfer the biscuit onto flat sheets of parchment paper, utilizing this steady dog treat dipping technique to prevent unsightly foot pooling along the bottom edges.
Keep your drying area cool and dry while the glossy surface transitions into a durable matte shell.
Delicate Linear Drizzle Application Across Golden Biscuit Ridges
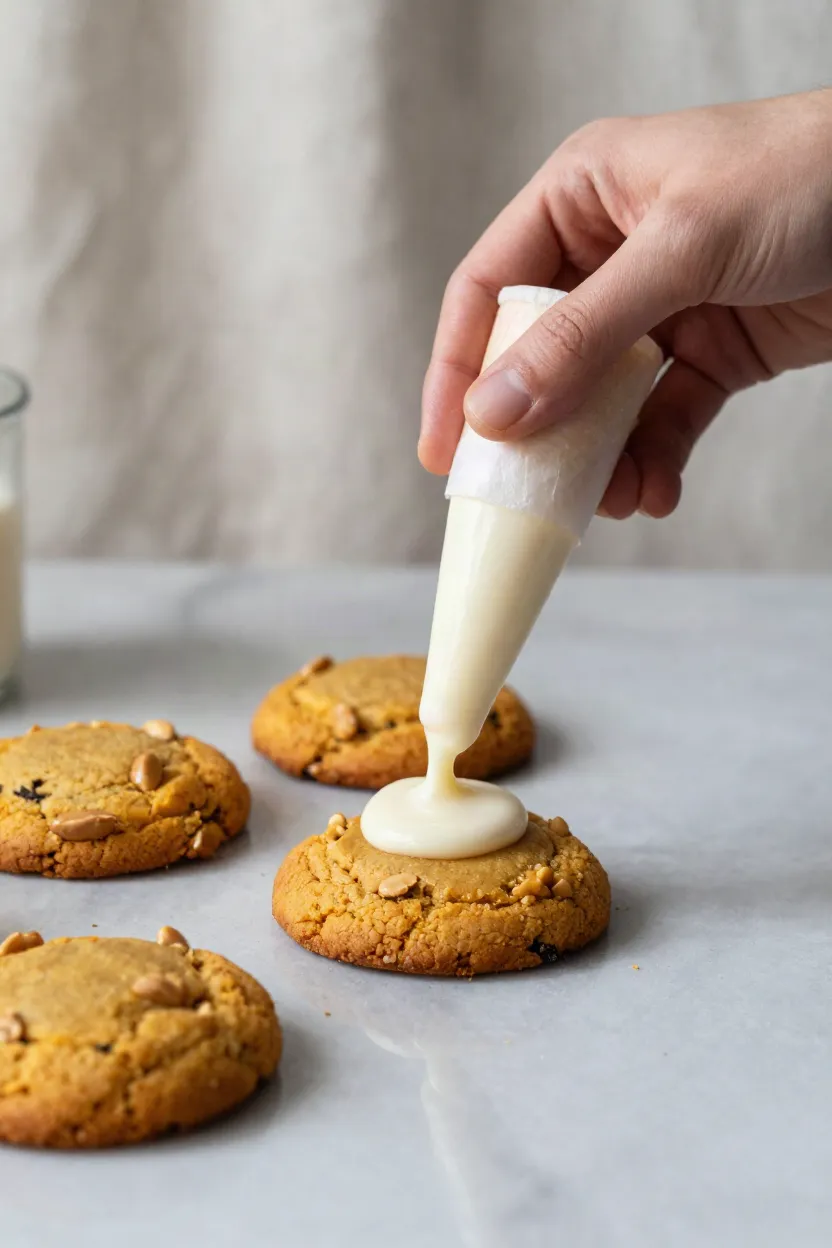
Uniform striping requires steady hand speed and accurate nozzle elevation when piping dog treats in bulk. Arrange your baked treats in tight, parallel rows so the back-and-forth motion stays fluid and unbroken. Hold a tapered parchment cone roughly 3 inches above the biscuit tops, guiding continuous canine bakery icing ribbons across the textured surface. For successful peanut butter pumpkin biscuit styling, test your mixture before decorating; the glaze must hold its raised profile for 4 seconds before slowly settling, which stops fine threads from sinking into the open crumb structure.
Maintain consistent wrist velocity during your dog biscuit glaze drizzle to ensure uniform line thickness across every ridge.
Fine-Tip Perimeter Piping for Defined Bone and Paw Contours
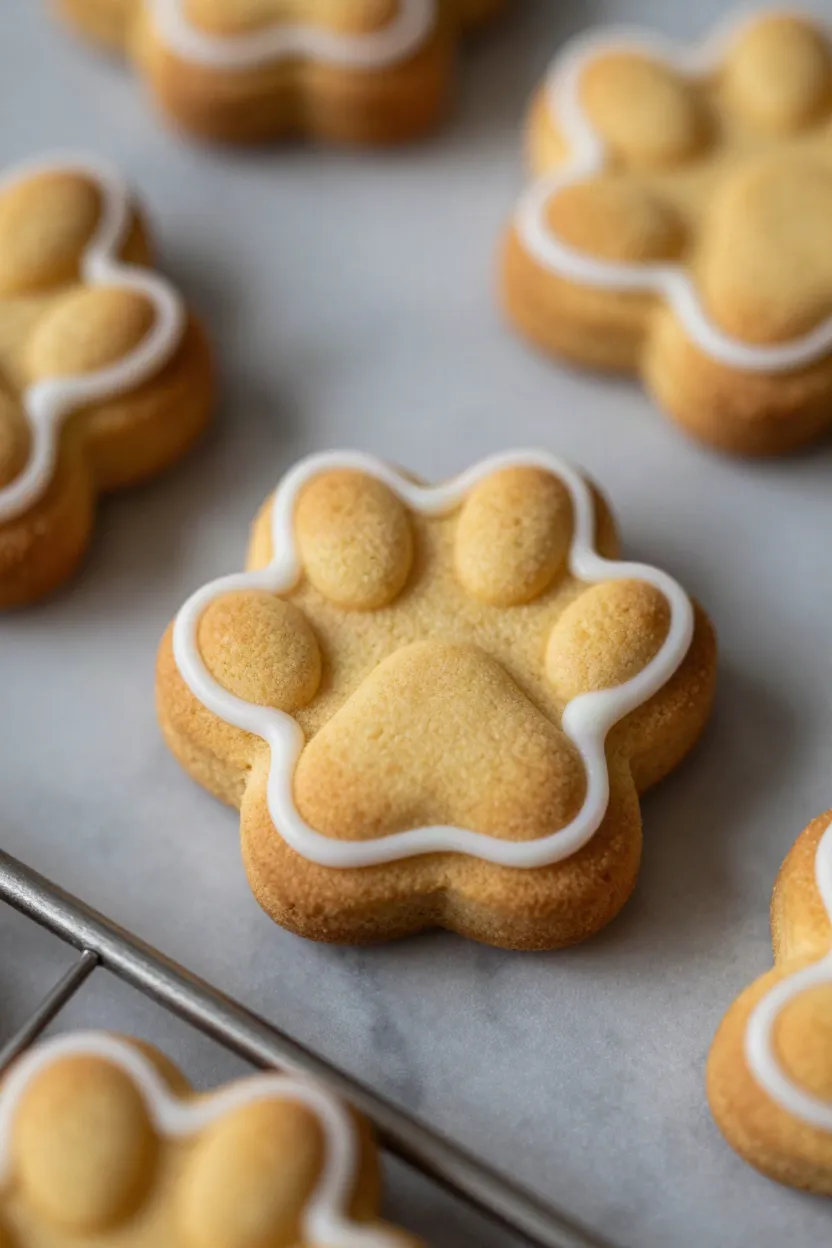
Outlining the outer edges of shaped treats creates a clean border that frames the golden baked base. Working with a firmer tapioca piping paste gives you full control over curved indentations without spreading or drooping.
- Equip your piping bag with a number 2 round nozzle to produce clean, narrow borders along compact bone and paw shapes.
- Hold the tip at a perpendicular 90-degree angle roughly 0.25 inch above the biscuit border, allowing the bead to drop cleanly onto the perimeter.
- Trace the full perimeter at a deliberate pace, establishing a solid raised dam that prevents flooding mixtures from spilling over uneven baked margins.
Apply these foundational dog biscuit decorating tips to refine basic canine bakery detail piping into sharp, professional presentations when piping dog treat borders for retail display.
Two-Tone Marbled Feathering Using Natural Carob and Yogurt Glazes
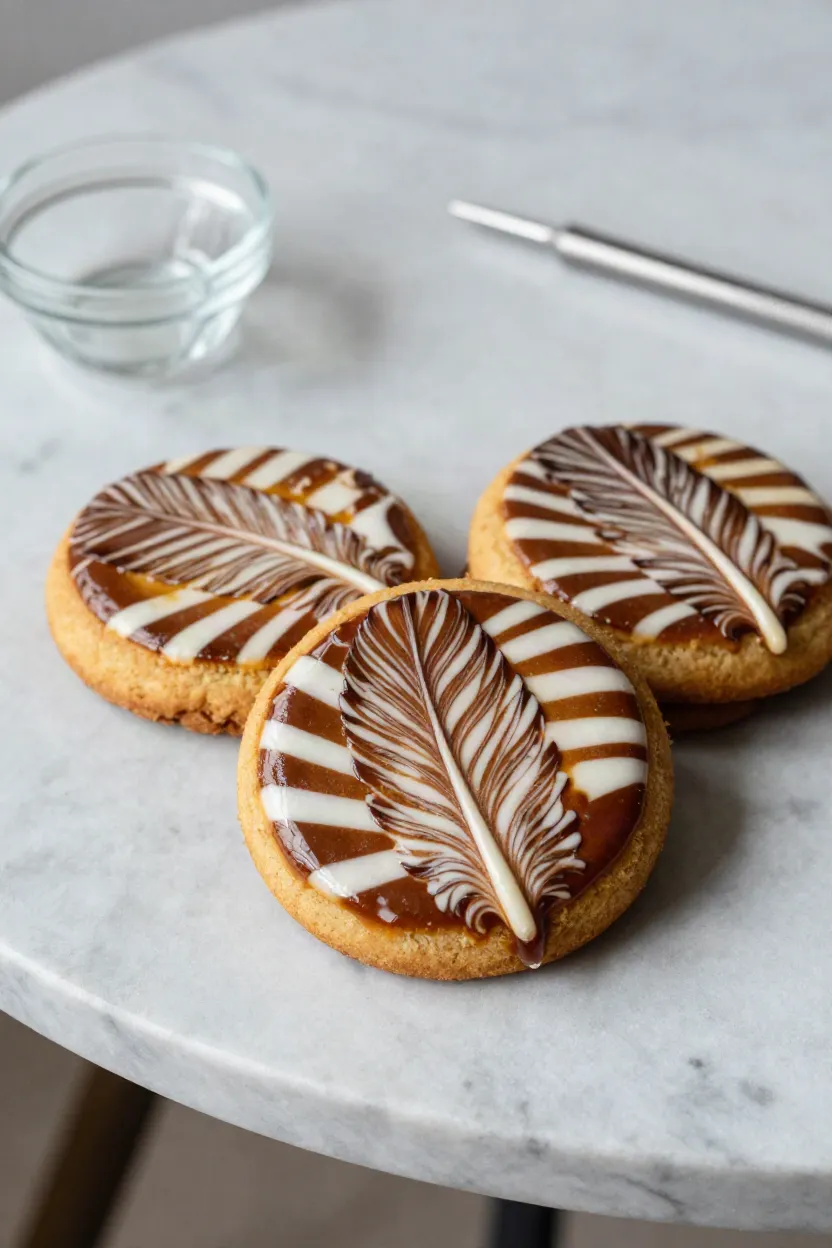
Creating dynamic swirl patterns across pumpkin treats requires a fluid wet-on-wet method before your base layer begins setting. For high-contrast marbled dog treats, pair a white Greek yogurt foundation with rich carob dog biscuit icing to produce sharp, bakery-grade graphics without synthetic food dyes.
- Flood the biscuit surface with your smooth yogurt base, spreading it evenly to the piped perimeter.
- Deposit three small droplets of carob mixture across the wet plane using a fine dropper or parchment cone.
- Draw a stainless steel scribe tool through the wet drops in alternating directional strokes, applying the dog safe feathering technique to pull chevron ribbons through the base.
Complete this entire canine pastry art sequence within 90 seconds. Tapioca starch begins surface gelatinization quickly at room temperature, and hesitating past that brief window creates torn skins and muddy drag marks across your finish.
Full Submersion Coating with Suspended Wire-Rack Runoff
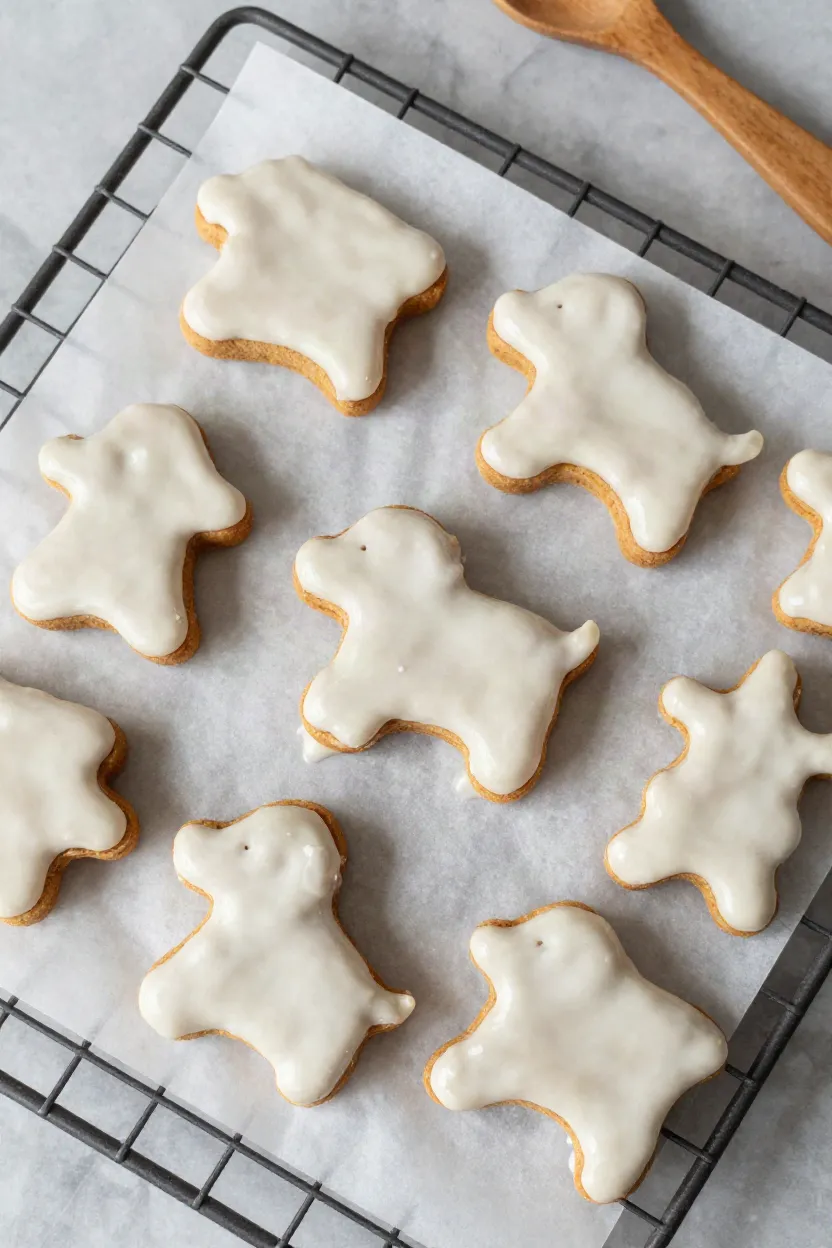
Total enrobing seals the baked pumpkin crumb beneath an even, satin layer that holds up well during packaging and handling. Preparing full dipped dog biscuits requires a loose consistency, steady hand movements, and proper equipment to prevent heavy pooling beneath the base.
- Lower each dry treat flat into the dog bakery glaze bath, allowing the liquid to crest evenly over all sides.
- Lift the treat cleanly using a slotted tapioca glaze dipping fork, keeping the tines parallel to the glaze surface.
- Tap the handle firmly 3 times against the bowl rim to dislodge air pockets and establish a smooth dog treat coating with an exact 1 millimeter shell thickness.
- Slide the wet biscuit onto a raised wire cooling rack so excess liquid sheds freely instead of pooling into thick bottom feet.
Place a clean sheet pan directly under the wire rack to catch falling droplets, ensuring clean edges while keeping your workspace organized.
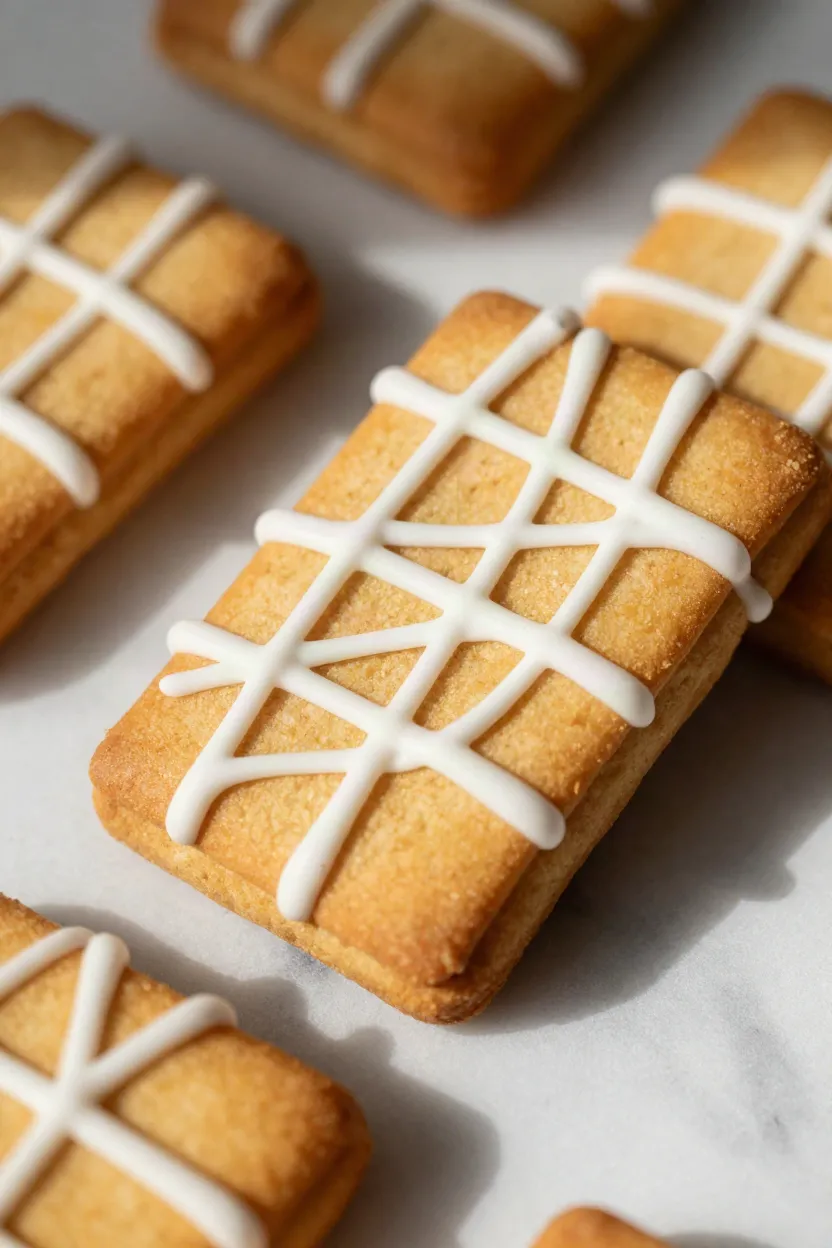
Crosshatch Lattice Piping for Grip and Visual Dimension
Geometric grid designs provide practical structural grip for dogs while turning simple baked biscuits into polished display pieces. When executing crosshatch dog treat piping, fill a parchment cone with medium-viscosity dog-safe icing and trim the tip to produce a slender, consistent bead. Hold the cone at a steady 45-degree diagonal angle across the baked surface, extruding continuous ribbons from one biscuit edge to the opposite border in clean, sweeping motions.
Maintain precise spacing intervals of 0.5 inch between parallel strands so each application of textured dog biscuit icing retains its distinct ridge. Once the initial directional passes set, rotate the biscuit 90 degrees and repeat the diagonal runs to complete the dog bakery lattice technique. This open grid spacing guarantees that the cooling glaze stays crisp without fusing into solid sheets, delivering a refined pumpkin dog treat presentation that cures evenly at room temperature.
Stenciled Botanical Dusting Over Moist Tapioca Wash
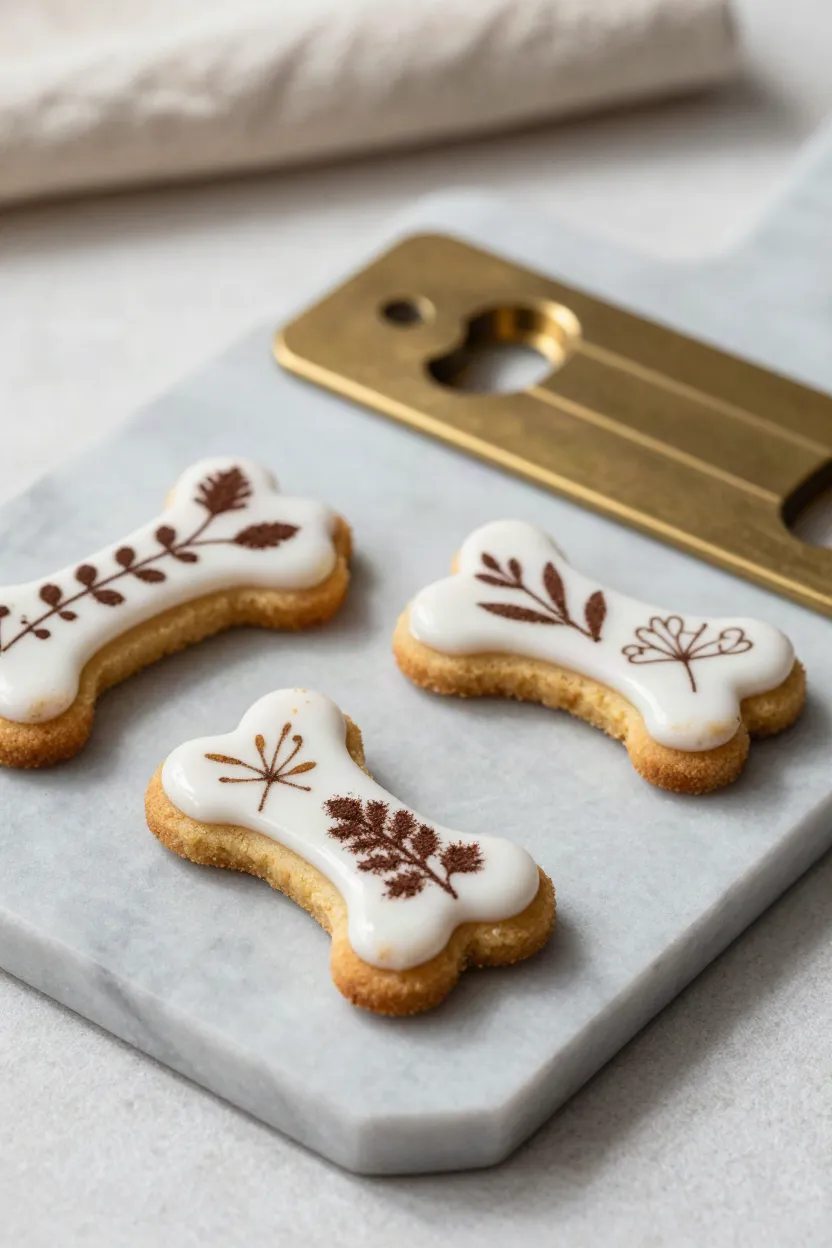
Crisp silhouette prints offer striking visual contrast against warm baked pumpkin dough without requiring heavy icing layers. Creating stenciled dog biscuits relies on a light priming glaze that catches fine botanical particulates while preserving razor-sharp stencil lines.
- Apply a sheer base of tapioca wash that dog treats can absorb lightly across the biscuit face with a wide culinary fan brush, removing excess moisture until the dough shows a gentle damp sheen.
- Center a brass culinary stencil flush over the surface, pressing the outer metal border down gently without indenting the crust.
- Sift natural powder dog treat decor, such as freeze-dried blueberry powder or fine carob powder, through a fine-mesh tea strainer directly over the cutouts.
Lift the brass stencil vertically in one continuous movement to prevent powder smearing across the damp borders. Surface tackiness demands careful moderation, because oversaturating the biscuit face causes liquid capillary migration that bleeds color outward, ruining the canine biscuit dusting motif.
Controlled Raised Droplet Accents and Concentric Dot Work
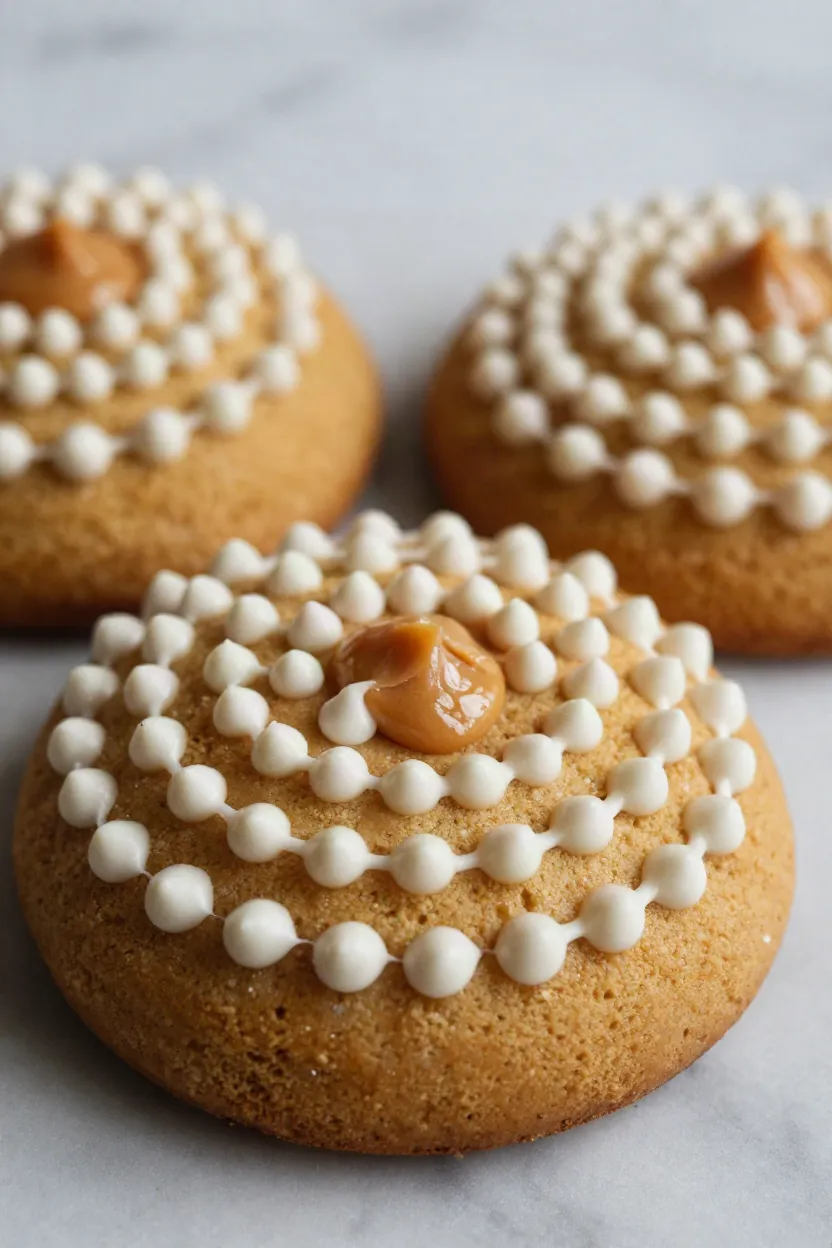
When you want to add tactile relief and visual contrast to flat biscuit tops, building dimensional beads and concentric clusters provides immediate shelf appeal. You will need a stiff-peak yogurt-tapioca emulsion that holds its shape against the dry surface without flattening or spreading. Applying raised dot dog treat icing requires steady downward pressure from a fine round nozzle, followed by a steady vertical release to ensure clean shapes.
- Position the piping tip perpendicular to the biscuit face roughly one eighth of an inch above the surface before squeezing out peanut butter biscuit dots.
- Terminate extrusion pressure completely before initiating a vertical release, finishing with a swift circular snap of your wrist to prevent tailing or conical peaks that crush during packaging.
- Cluster smaller satellites around a central bead when executing pearl piping dog treats to produce balanced geometric accents across wider biscuit bases.
- Maintain consistent nozzle spacing across every batch so your dimensional dog bakery glaze cures with uniform thickness and height.
This clean snap-off motion guarantees every round bead dries into a smooth hemisphere rather than a sharp spire that chips away in transit.
Glaze Viscosity Ratios and Starch Setting Formulas
Achieving clean lines and durable coats depends entirely on measuring your base ingredients by mass rather than casual volume estimation. Follow this canine bakery glaze measurements protocol and reference your dog icing consistency chart before mixing each batch for production.
- Weigh 60 grams (roughly 4 tablespoons) of strained Greek yogurt into a clean bowl, then stir in your chosen dog treat glaze ratio: 15 grams of tapioca starch for smooth dipping coats, 22 grams for linear drizzles, or 30 grams for stiff precision piping.
- Whisk in warm water gradually, adding between 5 to 15 milliliters depending on application target, to form a homogenous tapioca starch dog icing formula free of powdery lumps.
- Allow the mixed emulsion to rest undisturbed for 10 minutes at room temperature between 68 to 72 degrees Fahrenheit so the starch granules fully hydrate and stabilize before application.
This hydration window prevents unexpected thinning while you work and ensures uniform drying speeds across every decorated tray.
Moisture-Trapping Pitfalls and Room-Temperature Curing Protocols
Even the cleanest glaze application will fail if your post-decorating cure does not account for ambient moisture and airflow dynamics. Many decorators ruin crisp finishes by rushing biscuits into airtight tins or placing them in the refrigerator, which introduces heavy condensation sweating and softens the crust. To prevent sticky dog icing and guarantee a long dog treat shelf life storage window, you must follow a deliberate drying routine.
- Spread freshly decorated biscuits onto elevated stainless wire cooling racks rather than solid parchment sheets to promote unrestricted air circulation above and below each piece.
- Maintain a dedicated 12 to 18-hour curing dog biscuit glaze period in a room held below 45 percent relative humidity at standard room temperature.
- Avoid refrigerator cooling entirely, as cold air traps surface humidity and draws internal biscuit water straight into the starch glaze layer upon return to ambient warmth.
- Verify drying dog treat icing progress by lightly pressing a clean fingertip against a test edge before handling, ensuring zero tackiness or surface transfer.
Once the glaze reaches complete dry-touch hardness, you can package biscuits back-to-back without risking scuff marks or sticky surface adhesion.
Bakery-Grade Decision Framework for Consistent Treat Finishing
Selecting the right finishing technique depends directly on your batch volume, packaging method, and available prep time. For large production runs exceeding five dozen biscuits, half-dipping and continuous drizzling provide the fastest turnaround while maintaining clean lines. Precision piping and dimensional droplet accents demand higher labor allocation, making them best suited for premium single-treat packaging or custom gift boxes where individual visual impact commands top value.
You can streamline your entire dog treat decorating workflow by standardizing bowl sizes, piping tips, and drying racks before you begin mixing. As you step into commercial dog biscuit styling, treat your glaze formula with the same rigor you apply to oven temperatures. Following this structured canine bakery finishing guide ensures every finished batch presents smooth, dry-to-the-touch surfaces that hold up under real-world storage conditions.